You’re out on the water with your trusty Zodiac inflatable boat, ready for an adventure when suddenly you notice a small leak in the seam. Don’t panic; this is a common issue that can be fixed! And you can do it easily.
Begin by preparing the boat for repair, then locate the leak. Once you know where the leak is, you can fix it with the right adhesive and then cure it to ensure your repair is reliable and long-lasting.
In this article, I’ll go over the steps in repairing your Zodiac inflatable boat, including what to do before fixing, choosing the right adhesive, repairing seam leaks and fabric welds, and maintaining your boat. So keep reading!
What to Do Before Repairing?
This step is essential if you own a Zodiac inflatable boat and consider taking it in for repair. Repairing an inflatable boat can be a daunting task, and there are certain steps you should take before you bring it in for repair.
Prepare Your Tools and Materials
Before starting any repairs, it’s essential to gather all the necessary tools and materials. This will help ensure you have everything you need to complete the job effectively and efficiently. Some of the tools and materials you may need include:
- Inflatable boat repair kit
- Adhesive and glue
- Sandpaper or emery cloth
- Scissors or knife
- Ruler or measuring tape
- Patch material (e.g., vinyl or PVC)
Identify the Source of the Problem
Once you have gathered your tools and materials, it’s crucial to identify the source of the problem. This will help you determine what needs to be done to repair the inflatable boat.
Take a close look at the area that needs repair, and try to determine what caused the damage. This could be anything from a puncture to a tear or a leak.
Clean the Area
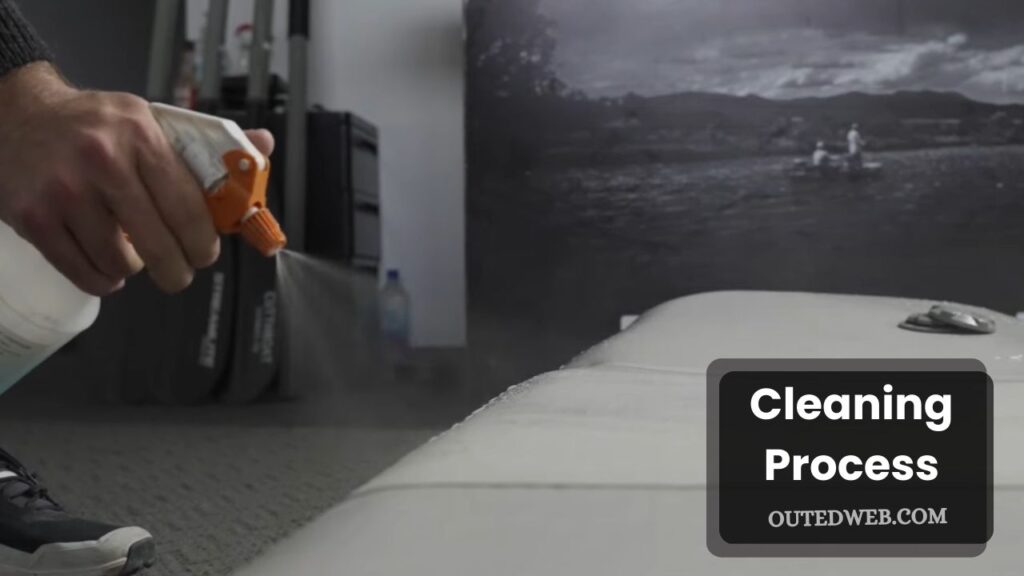
Before starting any repairs, it’s essential to clean the damaged area. Use soap and water to remove any dirt or debris from the area, and let it dry completely. This will help ensure that the adhesive sticks properly and creates a strong bond.
Note: Are You Looking For?
- Can You Use Automotive Power Steering Fluid In A Boat? [Click Here]
- Best Marine Radio With Bluetooth [Click Here]
- How to make a rudder for a sailboat [Click Here]
Choosing the Right Adhesive for Repair
Choosing the suitable adhesive is essential for successfully repairing your Zodiac inflatable boat. The right one will ensure a strong bond, preventing leaks and future damage to the boat.
Types of Adhesives
There are two main types of adhesives to choose from, contact adhesives and two-part epoxy adhesives. Contact adhesives are easy to use and dry quickly, making them a popular choice for small repairs. However, two-part epoxy adhesives are the better choice for larger repairs or added strength.
Factors to Consider When Choosing an Adhesive
When choosing an adhesive, there are several factors to consider, including the material of the boat, the location and size of the tear or hole, and the environment in which the boat will be used.
It is vital to choose an adhesive specifically designed for inflatable boats and compatible with the boat’s material.
Making the Right Choice
Before making a purchase, it is important to read the manufacturer’s instructions and recommendations for use. It is also recommended to seek advice from a professional or an experienced boater to ensure that you make the right choice for your specific repair.
How to Fix a Zodiac Inflatable Boat Seam Leak?
Now it’s time to talk about something that can be a real pain in the neck – repairing the seam leak for your zodiac inflatable boat. As any boater knows, a leak in the seam of your vessel can be a real hassle to fix, and it can be pretty costly if you don’t do it right.
But fear not because I’m here to tell you that there are a few ways to repair the seam leak yourself, and I’m going to tell you how. So let’s put on our work gloves and get ready to fix that leaky seam!
Step 1: Preparing the Inflatable Boat for Seam Leak Repair
Before repairing the seam leak, you must prepare the inflatable boat. Start by cleaning the area around the leak, using soap and water to remove any dirt or grime. Next, ensure the area is completely dry before repairing the leak.
Step 2: Finding the Leak
Once the area is clean and dry, it’s time to find the leak. You can use a bucket of water or a hose to fill the boat with water and then look for bubbles coming from the seams. If you find the leak, mark it with a pen or marker.
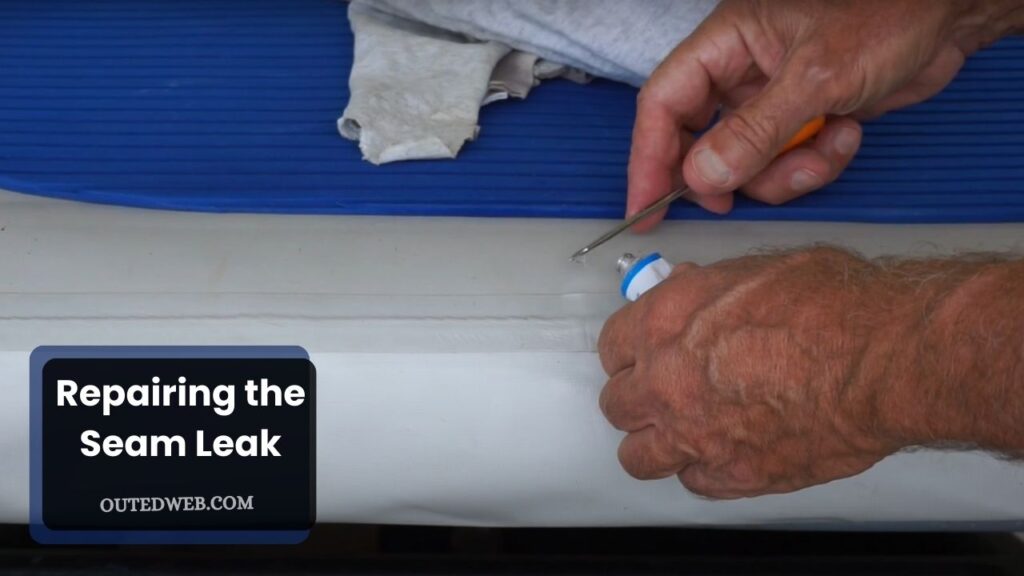
Step 3: Repairing the Leak
Now that you’ve found the leak, it’s time to repair it. Make sure you have a suitable adhesive for the repair. Then, apply a thin layer of glue to the area around the leak. Finally, use a patch or repair material to cover the leak and apply pressure to the area to ensure the repair sticks.
Step 4: Curing the Adhesive
After you’ve applied the patch or repair material, you need to let the adhesive cure. This can take anywhere from 24 hours to a few days, depending on the type of adhesive you’re using and the conditions in which you’re storing the boat. Ensure the boat is kept out of the sun and in a cool, dry place while the adhesive cures.
How do you repair fabric welds on a Zodiac inflatable boat?
Alright, now, if you find out that your Zodiac boat is leaking from a fabric weld, you’re in luck because it can be repaired. So here we go; let’s get into the nitty-gritty of how to fix it and more about it.
What are Fabric Welds?
You have probably seen or heard of fabric welds, but do you know what they actually are? Before diving into the main work, you must know about it if you are a novice to boating.
Fabric welds refer to the seams that hold together the fabric of an inflatable boat. They are usually made of a material that is heat-sealed to the fabric of the boat.
How to Identify a Fabric Weld Leak?
Fabric weld leaks are relatively easy to identify because they typically appear as bubbles along the seam of the boat. The bubbles are caused by air escaping from the boat through the tear in the seam.
Tools Needed for Repairing Fabric Welds
To repair fabric welds, you will need a heat gun, a clean cloth, a patch material, and a tube of repair adhesive.
Step-by-Step Guide to Repairing Fabric Welds
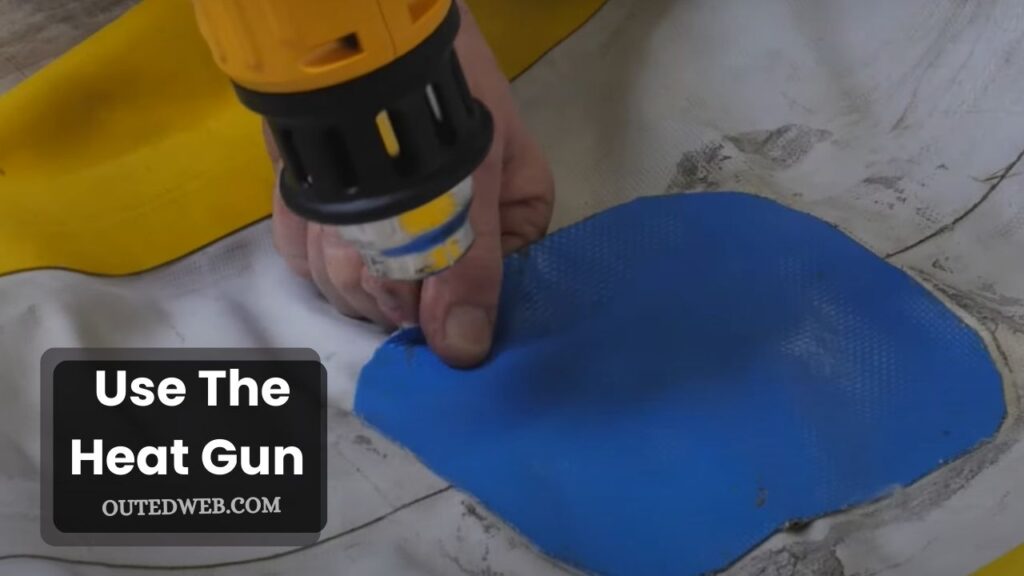
- Before you start the repair, ensure the boat’s surface is clean and dry. Use the heat gun to heat the area around the leak.
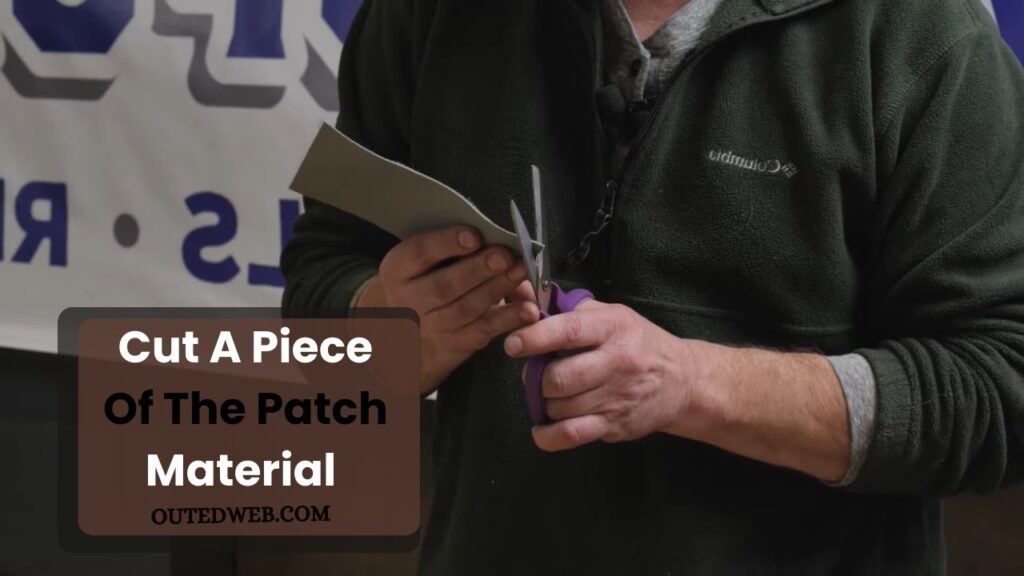
- Cut a piece of the patch material slightly larger than the leak. Apply the repair adhesive to one side of the patch and place it over the leak.
- Use the heat gun to heat-seal the patch to the boat’s fabric. Apply enough heat to ensure a strong bond between the patch and the fabric.
- Finally, let the repair cool completely before inflating the boat and checking for any leaks. If necessary, repeat the repair process until the leak is fully repaired.
With these steps, you can effectively repair fabric welds on your Zodiac inflatable boat and get it back to full strength and ready for use. Just remember always to work carefully and follow the manufacturer’s instructions for the best results.
Maintaining Your Zodiac Inflatable Boat
We all know the feeling of cruising the open waters on a zodiac inflatable boat! But did you know that to keep that same feeling, it’s crucial to maintain it? That’s right, like any other boat, your zodiac needs to be adequately cared for to keep it running smoothly and provide years of enjoyment.
Regular Cleaning and Drying
It’s essential to keep your Zodiac inflatable boat clean and dry after every use. Dirt and debris can wear down the fabric, while moisture can cause mold and mildew to form. To prevent this, be sure to clean your boat thoroughly with soap and water after each use, and let it air dry completely before storing it away.
Protecting from Sun Damage
Sun exposure can cause the fabric on your Zodiac inflatable boat to fade and deteriorate over time.
To prevent this, it’s important to store your boat in a cool, shaded place when it’s not in use and to cover it with a protective tarp or cover when you’re transporting it. You can also use UV-resistant fabric protectors to help extend the life of your boat.
Storing Your Boat Safely
When you’re not using your boat, it’s essential to store it properly to ensure it remains in good condition. Avoid storing it in damp or humid areas, as this can cause mold and mildew to form.
If you need to store your boat outside, cover it with a protective tarp or cover, and prop it up on blocks to prevent water from pooling underneath. Remember to inflate your boat regularly to prevent the seams and fabric from becoming brittle and prone to tearing over time.
Final Say
Repairing a Zodiac inflatable boat requires patience, attention to detail, and the right tools and materials. Whether it’s a seam leak, fabric weld, or tear, proper preparation and careful application of the right adhesive will help you get your inflatable boat back in shape and ready for the water.
Regular maintenance will also help extend the life of your boat and prevent future repairs. By following these steps and guidelines, you can confidently tackle any repair job, knowing that you have the skills and knowledge to get the job done right.
With proper preparation, a little effort, and determination, you can keep your Zodiac inflatable boat in top shape and ready for any adventure. Thank you for reading!
