You’re out on the lake, having a great time on your boat, when you notice some engine performance issues. Is it possible that it has something to do with the air-fuel mixture?
An oxygen sensor can help in this situation. Installing an O2 sensor in your boat can give vital data for optimizing engine efficiency and controlling emissions. How do you accomplish it, though? You’re in good hands; don’t worry.
To begin, selecting the proper O2 sensor for your boat is critical. Different types are available, so ensure compatibility with your engine’s specifications. Next, determining the best location for your O2 sensor is vital.
Typically, it should be positioned near the exhaust manifold or headers, where it can quickly capture exhaust gases and provide accurate readings. Consider factors such as vibration and heat exposure when finalizing the placement.
But that’s not all. This manual will take you step-by-step through the installation process, showing you how to remove the old sensor and firmly connect the new one. So let’s get going!
Read Related Articles:
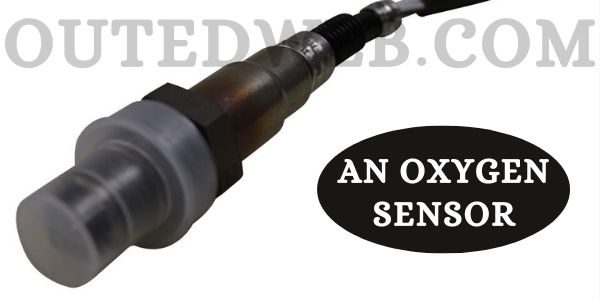
What Is An Oxygen Sensor?
An oxygen sensor is a device used in boats to measure the oxygen in exhaust gases. It provides feedback to the engine’s control system, helping optimize fuel efficiency and reduce emissions by ensuring the correct air-fuel ratio.
Where Should O2 Sensors Be Located?
Understanding the placement of O2 sensors is crucial for boat owners and enthusiasts, as these sensors play a pivotal role in ensuring optimal engine performance, fuel efficiency, and emission control. So, Let’s explore the different areas where O2 sensors can typically be found on boats.
The Exhaust Manifold
This is a prime location for O2 sensors in boats. Positioned near the exhaust manifold or header, these sensors monitor the oxygen content of the exhaust gases right after combustion.
By measuring the oxygen levels at this crucial point, the engine can optimize its performance and fuel efficiency. The O2 sensors are usually threaded into the exhaust manifold, allowing them to read the oxygen levels in the exhaust gases accurately.
Downstream of the Exhaust Manifold
In some boat models, O2 sensors may be situated in the exhaust pipe downstream of the exhaust manifold.
This placement allows the sensors to continue monitoring the oxygen levels as the exhaust gases flow through the system.
By analyzing the oxygen content at this stage, the engine management system can further adjust the air-fuel mixture for optimal performance.
Before and After the Catalytic Converter
O2 sensors may be found before and after the catalytic converter if your boat’s exhaust system has one. These sensors are essential for tracking the catalytic converter’s effectiveness.
The engine can evaluate if the converter is performing ideally to decrease harmful emissions by comparing the oxygen levels before and after the exhaust gases pass through the converter.
It’s important to remember that depending on the boat’s model, kind of engine, and manufacturer’s specifications, the location of O2 sensors on boats may change. Always refer to your boat’s documentation and owner’s manual or get in touch with the manufacturer for correct information on the location of O2 sensors in your particular boat type.
Different Types of O2 Sensors for Boats
Choosing the correct O2 sensor for your boat is crucial, ensuring compatibility with your engine’s specifications. These sensors provide valuable data to optimize engine performance and control emissions.
Unheated Oxygen Sensors
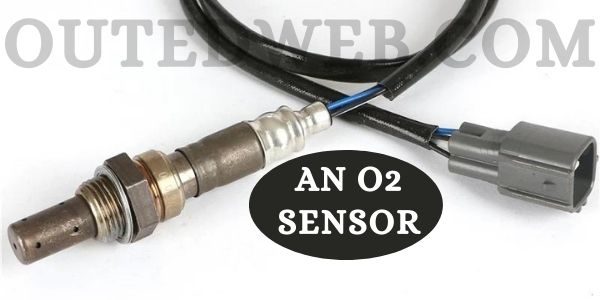
The unheated oxygen sensor is the most basic type, consisting of either one or two wires. One-wire sensors have a signal wire, while two-wire versions have an additional wire going to the ground.
Unheated sensors require external heat and are typically located near the engine’s exhaust ports. However, they have limitations, such as slower response times and the need for proper temperature before operation.
Heated Oxygen Sensors
To address the limitations of unheated sensors, three and four-wire heated oxygen sensors were developed. An internal resistor in these sensors warms up as an electrical current flows across it.
The heating element helps the sensor reach operating temperature more rapidly, allowing them to be placed in downstream locations on the exhaust system. Heated sensors also stay at the proper temperature for an extended period, providing more accurate readings.
Fast Light Off and Ultra-Fast Light Off Sensors
Fast Light Off (FLO) and Ultra-Fast Light Off (UFLO) sensors are designed to expedite warm-up time. They employ a low resistance, high-watt density heater. These sensors can reach operating temperature quickly, allowing for faster response times and more immediate data collection.
Wideband O2 Sensors
Wideband O2 sensors are capable of measuring a broader range of air-fuel ratios compared to narrowband sensors. They provide more accurate readings and allow the engine control unit (ECU) to make adjustments for optimal performance. Wideband sensors are essential for tuning purposes and are commonly used in performance boats.
How to Make a Hole for O2 Sensor
Your boat’s engine probably needs replacement parts on a regular basis if it’s anything like ours. This time, we will demonstrate how to drill a hole in an oxygen sensor. Anyone can do this short and simple method, which can end up saving you a tonne of cash over time.
Gather the Necessary Tools and Materials:
Before you begin, ensure you have all the tools and materials required for this job. You’ll need a drill machine with the appropriate drill bits, a wrench, safety goggles, a marker, a deburring tool, and the O2 sensor kit, typically including the sensor, wiring harness, and instructions.
Step 1: Locate the Ideal Spot
Next, you must find the perfect location to install the O2 sensor. The sensor should be placed downstream in the exhaust system, close enough to the engine to get accurate readings but not too close to avoid damage due to excessive heat.
Identify a spot on the exhaust pipe where you have enough clearance to make the hole without interfering with any other boat components.
Step 2: Prepare for Drilling
Once you’ve pinpointed the ideal spot, use the marker to draw a circle where you’ll drill the hole. This circle will act as a guide and help you maintain accuracy during the drilling process. Put on your safety goggles to protect your eyes from any metal shavings or debris that might come flying out during drilling.
Step 3: Drill the Hole
Now comes the exciting part! Take your drill machine with the appropriate drill bit size recommended for the O2 sensor and start drilling. Go slow and steady to maintain control and prevent damaging the exhaust pipe. Make sure the hole is the right size to fit the O2 sensor snugly.
Step 4: Deburring the Hole
After drilling the hole, it’s essential to deburr it to avoid any rough edges that could damage the O2 sensor or interfere with its readings. Use a deburring tool to smooth out the edges of the hole, making it clean and safe for sensor installation.
Where to Put O2 Sensor on Headers
Regarding O2 sensor placement on headers, there are a few essential factors to remember.
Proximity to the Exhaust Manifold
To obtain accurate readings, it’s essential to install the O2 sensor as close as possible to the exhaust manifold or header collector.
This location ensures that the sensor can detect the oxygen content in the exhaust gases without significant delays or interference.
By placing the sensor near the source, you improve the accuracy of the feedback received by the engine control unit (ECU).
Consider Heat and Sensor Performance
Heat is a crucial element in the performance of O2 sensors. For optimal performance, the sensor should be subjected to enough heat. The heat helps maintain the sensor’s functionality and prevents carbon buildup.
Therefore, choosing a heated O2 sensor is advisable, or ensuring that the sensor is located close enough to the engine to benefit from the generated heat.
Manufacturer’s Recommendations
While general guidelines exist for O2 sensor placement, referring to the manufacturer’s recommendations for your specific O2 sensor model and engine setup is essential.
Manufacturers often provide detailed instructions regarding sensor placement, wiring, and any additional considerations to ensure optimal performance. By following these guidelines, you can maximize the effectiveness of the O2 sensor and avoid potential issues.
Finding the Sweet Spot
Finding the perfect placement for the O2 sensor on headers might require some experimentation and fine-tuning. Some enthusiasts recommend keeping the sensor in the stock location for accurate readings, while others suggest placing it at the collector.
However, it’s crucial to measure lambda values during closed-loop operation with the engine running to verify the accuracy of the readings. This data-driven approach allows you to determine if any adjustments are necessary to optimize the O2 sensor’s placement.
How to Install an O2 Sensor in a Boat: The Process
We are all aware that O2 sensors are a crucial component of a boat’s engine and that they must be placed properly in order to work effectively. Installing an oxygen sensor in a boat involves the following steps:
Gather the Necessary Tools and Equipment
Make sure you have all the tools and supplies needed for the installation before beginning. A socket wrench set, wire strippers, electrical tape, and a heat gun are a few typical tools. Additionally, you’ll need the replacement O2 sensor designed for your specific boat engine.
Step 1: Locate the O2 Sensor
The O2 sensor is typically located on the exhaust manifold or the exhaust pipe. Refer to your boat’s manual or consult the manufacturer’s guidelines to pinpoint the exact location. Once you’ve located the sensor, ensure the engine is cool before proceeding.
Step 2: Disconnect the Battery
To ensure safety and prevent any electrical mishaps, disconnect the boat’s battery before starting the installation process. This step will help avoid any accidental shorts or sparks.
Step 3: Remove the Old O2 Sensor
Use the appropriate socket wrench to remove the old O2 sensor from its mounting location carefully. Take extra care not to damage the sensor or its wiring during removal. If the sensor is difficult to remove due to corrosion or other factors, applying some penetrating oil can help loosen it.
Step 4: Prepare the Wiring
Next, prepare the wiring for the new O2 sensor. Using wire strippers, carefully strip the protective covering from the wires to expose the metal. Take note of the color coding on the new O2 sensor and match it with the existing wiring.
Step 5: Connect the New O2 Sensor
Connect the new O2 sensor to the boat’s wiring by twisting the exposed metal ends together. Ensure a secure connection, and then use electrical tape to cover and protect the joint. This step will prevent any water or moisture from entering the connection.
Step 6: Secure the O2 Sensor
Carefully secure the new O2 sensor in its designated mounting location. Use the socket wrench to tighten it, but avoid overtightening, as it could damage the sensor or its threads.
Step 7: Reconnect the Battery
Now that the installation is complete reconnect the boat’s battery to restore power. Double-check all connections and ensure everything is properly secured before starting the engine.
Step 8: Test the O2 Sensor
It’s crucial to make sure the new O2 sensor is operating correctly. Run the boat’s engine for a few minutes after starting it. Watch the engine’s performance and look for warning lights or strange readings on the boat’s gauges. If everything appears normal, your new O2 sensor installation is a success.
What Causes O2 Sensors to Fail?
Now, we’re going to dive deep into the fascinating world of oxygen sensors and explore the causes behind their failures. So buckle up and get ready for some knowledge bombs!
Contamination Catastrophe
One of the major culprits behind O2 sensor failures is contamination. When gunk, grime, or harmful substances build up on the sensor, it can wreak havoc on its performance.
Contaminants like oil, carbon deposits, and exhaust byproducts can accumulate over time, throwing the sensor’s readings out of whack and eventually causing it to fail.
Time Takes Its Toll
Like all things in life, oxygen sensors have a limited lifespan. These bad boys can wear out over time due to the harsh conditions they endure. With exposure to high temperatures in the exhaust system, the sensor’s components gradually deteriorate, leading to eventual failure.
The average lifespan of an oxygen sensor ranges between 50,000 to 100,000 miles, but remember that it can vary depending on your boat and driving conditions.
Ignoring Maintenance
Folks, regular vehicle maintenance is crucial, and neglecting it can contribute to O2 sensor failure. When you skip those routine check-ups and fail to change engine oil and air filters as needed, you’re setting the stage for trouble. By neglecting proper maintenance, you allow contaminants to accumulate and wreak havoc on your sensor’s delicate components.
Cheap Gasoline Gambit
You’re on a road trip, low on fuel, and you pull into the sketchiest gas station in town. You fill up with that bargain-bin gasoline, thinking you’ve struck a deal. Well, think again!
Low-quality gasoline with high levels of impurities can contaminate your sensor over time, leading it down the path of failure. So, be mindful of where you refuel to avoid this pitfall.
Exhaust Leaks: The Silent Saboteur
Imagine your exhaust system with a leak. Not only will you sound like a jalopy, but you might also be harming your oxygen sensor.
A leaky gasket or exhaust manifold can introduce extra air into the exhaust stream, throwing off the sensor’s readings and potentially causing it to fail. Keep an ear out for any suspicious noises, and get those leaks fixed ASAP!
What to Do After Replacing Oxygen Sensor?
Let’s dive into what to do after replacing the oxygen sensor in your boat. It’s essential to follow a few key steps to ensure everything is in proper working order and maximize your engine’s performance. Here’s a comprehensive guide to post-replacement actions:
Double-Check Installation
Take a moment to verify that the oxygen sensor has been correctly installed. Ensure it is securely mounted and connected adequately according to the manufacturer’s instructions. Double-checking the installation helps avoid potential issues arising from loose connections or improper positioning.
Test the Connection
Once the oxygen sensor is in place, it’s crucial to test the connection to ensure accurate data transmission. Start the boat’s engine and monitor the sensor’s readings.
Check if the sensor is providing the expected data and functioning correctly. Testing the connection helps confirm that the new sensor is communicating effectively with the engine control system.
Monitor Engine Performance
After the oxygen sensor replacement, closely monitor the engine’s performance.
Observe factors such as fuel efficiency, throttle response, and overall smoothness of operation.
A properly functioning oxygen sensor helps optimize the air-fuel mixture, leading to improved engine performance and fuel economy.
Conduct Regular Maintenance
To maintain the longevity and accuracy of the oxygen sensor, it’s important to perform regular maintenance checks. Inspect the sensor periodically for any signs of damage, corrosion, or buildup.
Clean the sensor if necessary, following the manufacturer’s guidelines. Regular maintenance helps ensure the sensor continues to provide accurate readings and contributes to optimal engine performance.
O2 Sensor Troubleshooting on a Boat
To troubleshoot an O2 sensor, it’s important to recognize the symptoms of a failing sensor. These can include a decrease in fuel efficiency, rough idling, misfires, or even triggering specific OBDII codes related to the oxygen sensor.
Keep in mind that not all OBDII codes are indicative of a failed O2 sensor, as the sensor’s purpose is to report information rather than cause the issue itself. When faced with O2 sensor troubles, here are some steps you can take:
Check for Faulty Wiring
Inspect the wiring connected to the O2 sensor for any signs of damage, loose connections, or corrosion. Faulty wiring can lead to inaccurate readings or even complete sensor failure.
Clean or Replace the Sensor
If the sensor is covered in dirt, oil, or other contaminants, it may not function properly. In such cases, carefully clean the sensor using an appropriate solvent. If cleaning doesn’t resolve the issue, replacing the sensor might be necessary.
Verify Power and Ground Connections
Ensure that the O2 sensor receives proper power and ground connections. Faulty power or ground can disrupt the sensor’s performance and accuracy.
Consult the Manufacturer’s Manual
Each boat and engine model may have specific troubleshooting steps and diagnostic procedures recommended by the manufacturer. Referring to the manual can provide valuable insights tailored to your boat’s setup.
Seeking Professional Help
If the troubleshooting steps don’t resolve the issue, it’s advisable to seek assistance from a qualified marine technician or boat mechanic. They have the expertise and specialized tools to diagnose and address complex O2 sensor problems effectively.
Codes for Oxygen Sensors That Are Commonly Encountered
In the world of boating, oxygen sensors play a crucial role in monitoring and optimizing engine performance. These sensors are responsible for measuring the amount of oxygen in the exhaust gases, providing valuable data to ensure the correct air-fuel mixture for efficient combustion.
When issues arise, specific fault codes associated with oxygen sensors can help pinpoint the problem. Here are some commonly encountered codes for oxygen sensors in boats:
Fault Codes 851-11 and 871-11
These fault codes have been reported by some boat owners, specifically in the context of the 2021 Bayliner VR5 Sterndrive model.
The codes indicate a lean condition on both sides of the V6 engine, potentially due to insufficient fuel pressure or volume.
Lean running can lead to reduced power and potential engine damage, making it crucial to address the underlying fuel delivery issue.
Fault Code 312
Another commonly encountered fault code in boats is Code 312, indicating a slow response from the port-side pre-catalytic converter oxygen sensor.
This fault code has been reported in a Mercury 5.0 MPI engine with a catalyst. Proper testing of the oxygen sensor, including using a multimeter or circuit tester, can help verify its functionality.
Intermittent O2 Sensor Alerts
Some boat owners have reported intermittent alerts related to oxygen sensors, causing frustration and uncertainty.
These alerts may indicate underlying tuning or fuel control system issues rather than a faulty sensor itself.
Thorough diagnosis by experienced professionals is essential to identify and address the root cause of the recurring alerts.
Importance of Proper Diagnosis
It’s crucial not to jump to conclusions and replace oxygen sensors without identifying the actual problem. Replacing a functioning sensor can be a common mistake made by DIY mechanics.
Proper diagnosis, including checking the fuel control system, circuitry, and other potential causes, is necessary to ensure accurate repairs and optimal engine performance.
Remember, these codes are provided as examples and may not cover all possible fault codes encountered with oxygen sensors in boats.
It’s always recommended to consult the boat’s owner’s manual, contact the manufacturer, or seek the assistance of a certified marine mechanic for precise information on specific fault codes related to your boat’s oxygen sensor system.
Frequently Asked Questions
- What Is An O2 Sensor Spacer?
An oxygen sensor spacer is a device fitted between the engine and the oxygen sensor. The spacer’s purpose is to establish a distance between the sensor and the engine, allowing the sensor to detect the oxygen level of the exhaust gas properly.
- Are All O2 Sensors The Same?
No, not all O2 sensors are created equal. Several varieties of O2 sensors are on the market, each designed for a particular need. O2 sensors come in various brands, each with unique characteristics and advantages.
- Are Oxygen Sensor Spacers Legal?
Because laws differ from nation to nation, there is no conclusive response. Installing an oxygen sensor spacer, for instance, is permissible in the US, although certain limitations exist. In Canada, however, installing an oxygen sensor spacer is not legal.
Final Say
You know how to put an oxygen sensor in a boat now that you’ve read this article. A few hours and the right equipment are all that are required to install an oxygen sensor in a boat.
The most crucial thing to keep in mind is to take your time and use caution to prevent damage to the sensor or the boat during installation. Anybody can install an oxygen sensor in their boat with time and careful attention to detail.
