You’re out on the water, enjoying a beautiful day on your boat. Abruptly, you notice something isn’t quite right. One of your electronics isn’t working correctly, or your lights are flickering. You start to investigate and realize a short in your boat’s wiring. Now what? How do you find out?
Start by checking all of the connections in your boat’s wiring system. Make sure they are secure and free from any corrosion. Next, grab a circuit tester to check for power at various points along the wiring. This will help you pinpoint the location of the short.
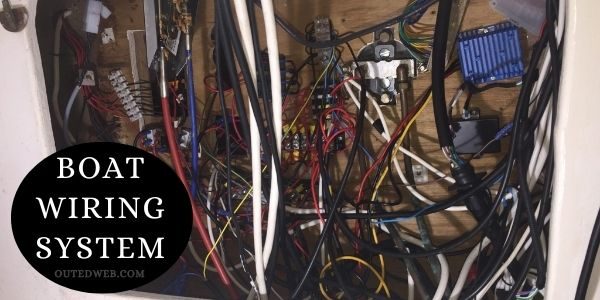
Look for any exposed wires or signs of damage, such as frayed insulation. These are often telltale signs of a short circuit. Additionally, visual inspection is crucial for identifying wires that have drooped into the bilge water or show signs of chafe and wear.
By following these steps and employing other techniques outlined in this guide, you’ll be well on your way to locating and resolving the short in your boat’s wiring. So, let’s dive in and get your electrical system shipshape again!
Note: Are You Looking For?
What Do You Need to Know Before Finding a Short in Boat Wiring?
Before you embark on the task of finding a short in boat wiring, it is crucial to familiarize yourself with a few key factors that are essential for your next steps. Understanding these matters will provide you with valuable insights and ensure a smoother and more effective troubleshooting process.
What Exactly Is a Short?
A short is a boat wiring problem that occurs when the electrical current flowing through the wires is interrupted. This can happen when a wire is frayed or damaged or when a connection is not tight. A short can also occur if there is a break in the insulation surrounding the wires.
What Are The Various Types Of Shorts For Boats?
Let’s examine these three categories of shorts in more detail to comprehend their distinctive features and effects.
Conductive Shorts:
When conductive shorts arise in an electrical circuit, a low-resistance connection forms between two conductors that should have different potentials. This unintended pathway allows current to bypass the intended circuit components, potentially leading to dangerous consequences.
Conductive shorts typically occur when a hot wire comes into contact with a neutral wire or a grounded part of the system.
Factors like faulty circuit wire insulation, aging wires, or even pests damaging the wiring can contribute to conductive shorts.
The resulting excess current flow can cause overheating, sparks, fires, and damage to electrical equipment.
Inductive Shorts:
In contrast to conductive shorts, the term “inductive shorts” is not widely used in electrical circuit discussions. However, it may refer to situations where unintended current flow arises due to the induction of electromagnetic fields in nearby conductors.
These electromagnetic interactions can create unexpected pathways for current, potentially causing disruptions in the circuit’s normal operation. Additional information or context would be required to delve deeper into this topic.
Resistive Shorts:
Similar to inductive shorts, resistive shorts is not a commonly used term in the context of electrical circuits.
It may allude to scenarios where the resistance in a circuit is lower than anticipated, potentially due to faults or abnormal conditions.
These resistive anomalies can affect the circuit’s performance and may require investigation and remediation by qualified professionals.
How Do You Tell If You Have a Shorted Wire?
When it comes to identifying a shorted wire, there are a few telltale signs you can look out for. These indicators can help you pinpoint the presence of a short circuit and take appropriate action. Let’s explore them.
- Power disturbances: Keep an eye out for frequent power fluctuations or sudden interruptions in your electrical circuits. These could be signs of a short circuit, as the alternate pathway created by the short can disrupt the regular power flow.
- Tripped circuit breakers and blown fuses: If your circuit breakers constantly trip or your fuses frequently blow, it’s a clear indication of an underlying issue, possibly a shorted wire. These protective devices are designed to detect abnormal electrical flow and shut off power to prevent damage or hazards.
- Unusual heat or burning smell: If you notice excessive heat around electrical outlets, switches, or wires, it could be a sign of a short circuit. The high current caused by the short can generate heat and pose fire hazards.
- Sparking or arcing: When you witness sparks or electrical arcing coming from an outlet, switch, or appliance, it’s a strong indicator of a short circuit. Arcing occurs when the electricity jumps across a gap caused by a damaged or shorted wire.
What Is the Difference Between a Short Circuit And a Dead Short?
Now, we’ll clarify the differences between two concepts that frequently cause misunderstandings: short circuits and dead shorts.
Short Circuits: Unleashing the Electrical Chaos
- A short circuit is an abnormal connection between two nodes in an electric circuit.
- It occurs when a low-impedance path forms, allowing excessive current to flow.
- Factors contributing to short circuits include faulty wiring, damaged insulation, or equipment failure.
- During a short circuit, resistance and voltage drop may occur between the two points.
- The measured voltage between the points is lower than the expected voltage.
Dead Shorts: When Zero Resistance Takes Over
- A dead short is a specific type of short circuit characterized by zero resistance or impedance.
- It represents a direct connection between positive and negative power wires or between positive wire and ground.
- In a dead short, current flows along an unintended path without encountering any resistance.
- The measured voltage between the points is precisely zero.
- Dead shorts are highly dangerous due to the excessive current flowing through the circuit, which can damage equipment, cause electric shocks, or even start a fire.
What Are the Common Causes of Shorts in Boat Wiring?
For an electrical system to run smoothly, understanding typical short causes is crucial. Let’s investigate more to learn the motivations behind these shorts.
Loose Connections
One of the primary culprits behind shorts in boat wiring is loose connections. When the connections become loose, electricity can’t flow smoothly, leading to potential shorts. It’s crucial to ensure all connections are properly secured, avoiding any disruptions in the electrical flow.
Damaged insulation
Imagine a wire with its insulation frayed or worn down, exposed to the elements. This scenario is a recipe for disaster, as these wires can come into contact with other wires or metal surfaces, causing shorts. Visual inspections play a vital role in identifying any signs of damage, allowing for timely repairs.
Faulty Components
Just like any other electrical system, boat wiring relies on various components, such as switches, breakers, and appliances.
When these components develop faults, such as internal wiring issues, they can cause shorts. Regular checks and prompt replacement of faulty components are necessary to maintain a reliable electrical system.
Improper Wire Sizing
Choosing the right wire size is crucial for preventing shorts. Incorrectly sized wires, whether too thin or too thick, can lead to overheating and electrical failures. It’s essential to follow the recommended wire sizes specified by industry standards, ensuring proper current flow without risking damage.
Environmental Factors
The marine environment presents unique challenges to boat wiring. Saltwater, vibrations, and high temperatures can all contribute to shorts.
Saltwater infiltration can cause corrosion, vibrations can lead to wire fatigue and loosened connections, and high temperatures can degrade the insulation.
Taking preventive measures, such as using marine-grade wiring and protective coatings, can help mitigate these environmental risks.
How to Find a Ground Fault in a Boat?
A ground fault is a typical problem that may cause havoc on your electrical system and possibly jeopardise your vessel’s safety. So, let’s get started and look at the actions you may take to find these elusive offenders.
Step 1: Understanding the Basics
To begin our quest, it’s crucial to grasp the fundamentals of ground faults in boats. Essentially, a ground fault occurs when current leaks from the AC or DC electrical systems to unintended paths, such as the boat’s hull. This can drain your batteries, lead to corrosion, and pose potential hazards.
Step 2: Checking the Battery Ground
The first area to investigate is the battery ground. In boats, the negative terminal of the battery serves as the grounding point. Ensure that the battery ground connection is solid and secure, and verify that it is connected to a ground block or bus bar.
Step 3: Inspecting Wiring and Connections
Next up, it’s time to examine your boat’s wiring and connections meticulously. Look out for any signs of damage, loose connections, or corrosion. Keep an eye on areas where wiring may be exposed or rubbing against sharp edges.
Step 4: Utilizing a Multimeter
A trusty multimeter can be your ally in this journey. Set it to the continuity or resistance mode and check for continuity between the positive side (hot wire) of the electrical system and the boat’s unintended grounds. If there’s continuity, you may have found a ground fault.
Step 5: Isolating Circuits
To narrow down the search, isolate different circuits within your boat’s electrical system. Switch off all the switches and disconnect devices one by one—test for continuity after each disconnection to identify the specific circuit with the ground fault.
Step 6: Inspecting Devices and Components
Now it’s time to focus on individual devices and components connected to the suspected circuit. Thoroughly examine outlets, switches, lights, pumps, and any other equipment for signs of damage, water ingress, loose connections, or faulty insulation.
Step 7: Seeking Professional Help
If you’re feeling overwhelmed or unable to locate and resolve the ground fault, don’t hesitate to seek assistance from a qualified marine electrician. They possess the expertise and tools to tackle complex electrical issues in boats.
What Tools Are Needed to Find a Short in Boat Wiring?
Short circuits in boat wiring can be frustrating and dangerous. To find and fix a short, you’ll need a few tools:
Circuit tester
A circuit tester is a crucial tool for identifying power at various points along the wiring. It helps pinpoint the location of the short circuit by checking for voltage at different connection points.
Multimeter
A multimeter is a versatile tool that allows you to measure voltage, current, and resistance. Set it to the appropriate setting and use it to check for continuity between wires, helping you identify the specific wire or component causing the short.
Flashlight
A good quality flashlight is essential for visually inspecting the wiring. It helps you identify any exposed wires, frayed insulation, or signs of damage that could indicate a short circuit.
Wire crimpers, strippers, and cutters
These tools are necessary for making repairs or replacing damaged wiring components. Wire crimpers ensure secure connections, while strippers and cutters help prepare the wires for proper installation.
Shrink tubing and connectors
Shrink tubing provides insulation and protection for repaired or spliced wires. Connectors help join wires securely and prevent shorts caused by loose connections.
How to Find a Short Boat Wire: The Process
It might be quite difficult to locate a short in your boat’s wiring, so don’t worry! Simply follow the detailed procedure provided to find the offender.
Step 1: Visual Inspection
The first stage in this investigation is to do an in-depth visual examination of your boat’s wiring system. Examine all of the wires, connections, and components.
Examine exposed wires, frayed insulation, and indicators of damage such as chafing or wear. It’s also critical to keep an eye out for frayed wires. Remember, a keen eye is crucial in spotting any visible issues.
Step 2: Check Connections
Now that you’ve given the wiring a good look, it’s time to check those connections. Ensure all the connections in your boat’s wiring system are secure and corrosion-free.
Loose connections can lead to poor conductivity and potentially cause a short circuit. So, tighten up any loose connections and clean off any corrosion using a suitable electrical contact cleaner.
Step 3: Test for Continuity
To find that sneaky short, we need to employ the power of a multimeter. Set your trusty multimeter to the appropriate setting and check for continuity between each wire in the system.
Touch the probes to each end of the wire and see if there’s any continuity or a low resistance reading. If you detect a sudden drop in resistance or no continuity at all, it’s a strong indicator that there’s a short in that wire.
Step 4: Circuit Testing
Now it’s time to put on your detective hat and grab a circuit tester. This handy tool will help you trace the problem and identify the location of the short circuit.
Start by testing the power source and then move along the wiring, checking different components and connections. This method will guide you toward the area where the short is occurring, making it easier to isolate the issue.
Step 5: Insulate Exposed Wires
During your inspection, if you come across any exposed wires, it’s crucial to insulate them properly. Use electrical tape or heat shrink tubing to cover the exposed sections.
This insulation will prevent the wires from coming into contact with other wires or metal surfaces, reducing the risk of shorts and ensuring the safety of your boat’s electrical system.
Step 6: Seek Professional Help
If you find yourself struggling to locate the short or if your boat’s wiring system is complex, it’s time to consider seeking the assistance of a professional marine electrician.
These experts have the knowledge and experience to diagnose and repair complex wiring issues. Don’t hesitate to ask for help if needed – it’s better to ensure the job gets done right and safely.
How to Prevent Shorts in Boat Wiring
Shorts can be a real headache, causing electrical malfunctions, potential hazards, and even fires. So, let’s dive into this and make sure you’re well-prepared out on the water.
Proper Wiring Routing and Installation
When it comes to boat wiring, proper routing, and installation are key. You want to ensure that the electrical cabling is routed in a way that minimizes stress and strain.
Avoid sharp cutouts in bulkheads, routing over engine bell housings, and around motor-mount brackets. By taking these precautions, you’ll reduce the risk of damage to the wiring and potential shorts.
Secure Connections and Regular Checks
Checking and maintaining secure connections is crucial for preventing shorts. Regularly inspect all the connections in your boat’s wiring system, ensuring they are tight and free from corrosion.
Use moderate force to check the security of ring terminals, ensuring they can’t rotate. By keeping a close eye on these connections, you’ll minimize the chances of loose or compromised wiring causing shorts.
Visual Inspection and Circuit Testing
A visual inspection of the wiring is essential in identifying potential short-circuit risks. Look out for exposed wires, frayed insulation, or signs of damage. Additionally, pay attention to wires that may have drooped into bilge water or show signs of chafe and wear.
To pinpoint the location of a short circuit, use a circuit tester and check for power at various points along the wiring. This will help you identify any areas that require immediate attention.
High-Quality Marine-Rated Components
Using high-quality, marine-rated cables and terminals is vital for a reliable and safe electrical system. These components are designed to withstand the harsh marine environment, including salt, vibration, and exposure to water.
By investing in marine-rated components, you’ll significantly reduce the risk of shorts caused by corrosion, vibration-related damage, and insulation degradation.
Proper Crimped Connections
Ensuring proper crimped connections is another essential step in preventing shorts. Neat and secure crimped terminals allow for the free movement of electricity, resist moisture intrusion, and prevent open and short circuits.
Take the time to practice making perfect crimped joints using spare pieces of cable, ensuring your connections are reliable and long-lasting.
Frequently Asked Questions
- What Causes Low Voltage in a Boat?
There are a few potential causes of low voltage in a boat. One possibility is that the batteries are not being charged properly. Another possibility is that there is a problem with the wiring or the alternator. If the boat is not being used regularly, the batteries may need to be replaced.
- What Happens When There Is a Short on the Ground?
When there is a short to ground, it means that there is a connection between the electrical circuit and the ground. This can happen if the wires are touching each other or if there is a loose connection.
When this happens, the current will flow through the ground instead of through the wires. This can cause damage to the wires and the electrical components.
- How Do You Find a Short Circuit in a Circuit Diagram?
To find a short circuit in a circuit diagram, look for any two wires that are connected together. These wires will have a solid line between them instead of a dotted line.
Final Say
Promptly addressing and resolving a short in boat wiring is essential for the safety and functionality of your vessel. By following a systematic approach, you can effectively locate and fix the source of the short. Regular maintenance and inspection of boat wiring are crucial for preventing future issues.
Remember to seek professional assistance if needed. By adhering to these guidelines, boat owners can ensure the longevity and reliability of their boat’s electrical system. Stay proactive and maintain a safe boating experience.
